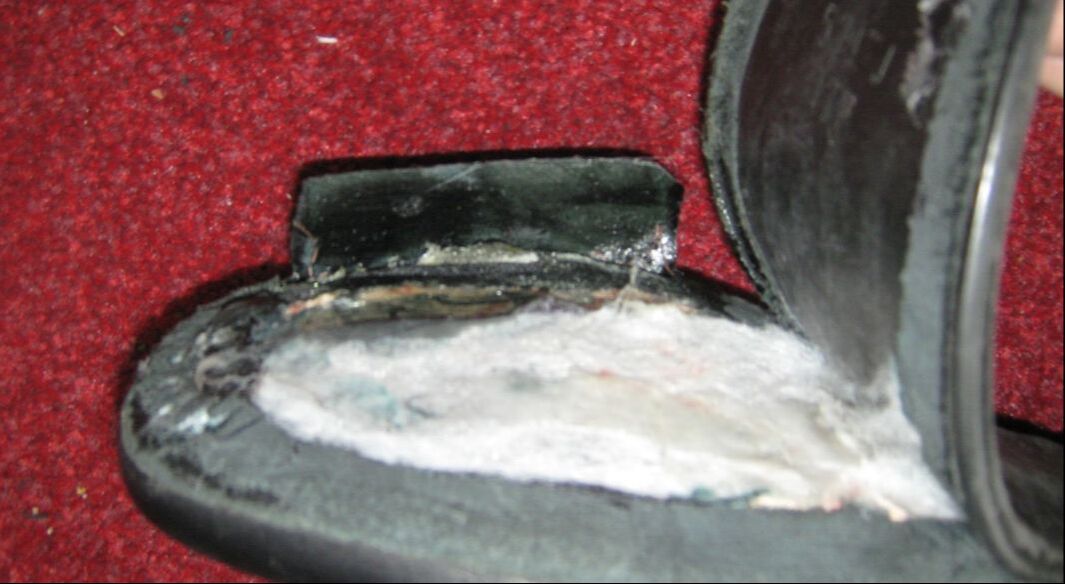
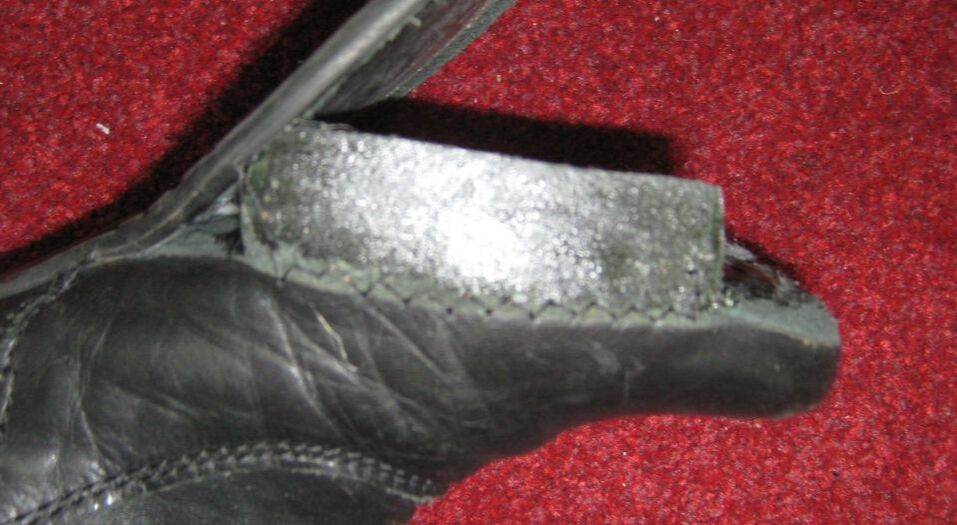
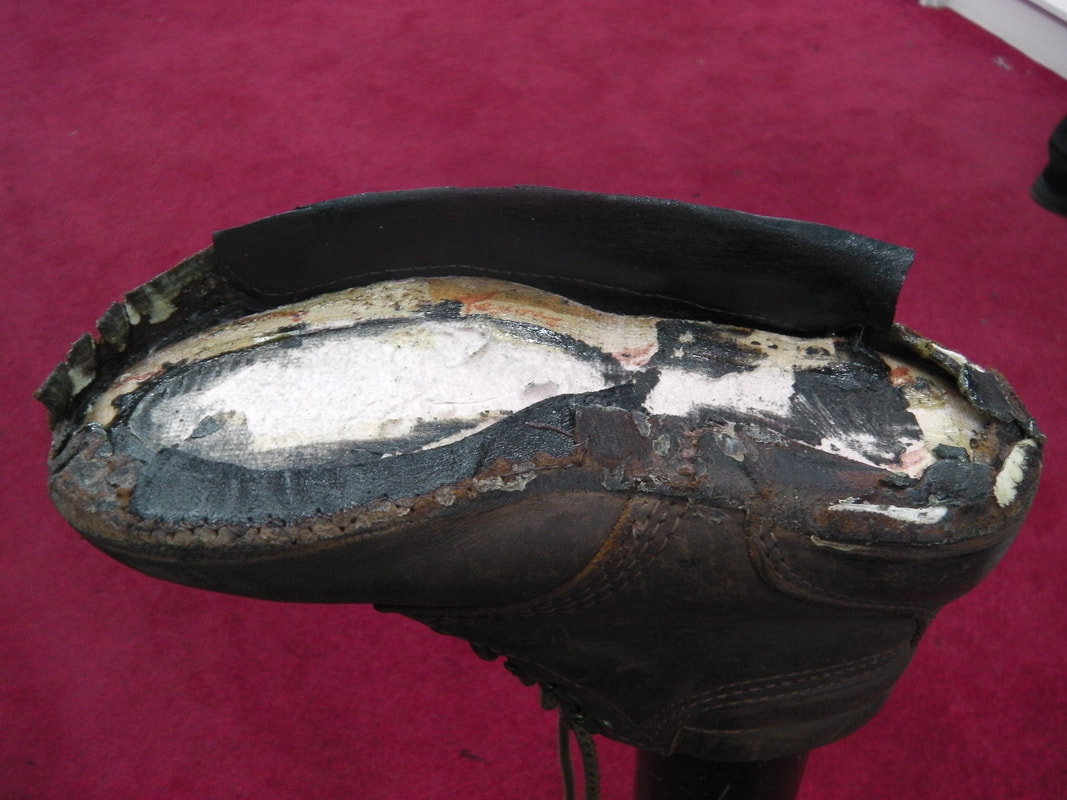
Patch tear near sole
Sure so we will pop a patch in between the upper and the lining, it will be glued in and we will probably stitch
it as well, the stitching will be pretty much out of sight.
it as well, the stitching will be pretty much out of sight.
Main Steps
|
1. Remove Sole
2. Cut, skive and glue patch in 3. Stitch patch 4. Glue upper back to insole board 5. Glue Sole back on Pricing Can be a bit cheaper if doing the 1/2 soles at the same time, or doing 2 or more patches on one shoe, as we are removing the sole anyway. |
|
Main Steps Explained
|
1. Remove Sole, push down, and in with large
screwdriver, then use pincers. Otherwise heat. 2. Cut, skive and glue patch in, thin flexible strong leather (1.2mm), 25mm wide and as long as the tear plus 10mm each end, round the top corners, Skive top and ends. Grind out side now if needed. 3. Stitch patch, zig zag and keep out of site 4. Glue upper back to insole board, take care to get the upper shape back to normal 5. Glue Sole back on, check for fit first Test |
PATCHING TEAR IN SIDE NEXT TO SOLE
Deciding whether to remove sole – if you can patch it without removing the sole, go for it. Otherwise remove the sole.
Removing the sole – use pincers gently and maybe a screwdriver poked all the way around to start the glue coming undone. Heat may help but best used as a last resort as it can give you other issues, melting, burning, upsets the glue and makes the sole twist out of shape.
Gluing - the patch in – one coat onto patch and the upper but not the lining, then pop the patch in, check that it has not bunched up anywhere and that it covers the tear at both ends and that the patch goes over both sides by 10mm.
Stitching - less stitching is usually better than more stitching, you want as little stitching showing as possible while still ensuring a robust repair. Zig zagging along the tear is often the best.
Gluing - the lining back – just enough to hold it in place while you glue the lining and upper back onto the insole board, check that there is no bumps or creases in the lining
Gluing - the lining and the upper onto the insole board – look for marks and lines on the insole board that indicate where the upper used to sit glue the lining and upper back onto the insole board, recheck that there is no bumps or creases in the lining, and also check that the upper now fits nicely onto the sole – all the way around, if it doesn’t now is the time to pull it apart and let a bit out or tuck a bit more in.
Gluing – upper to the sole – sometimes atom is appropriate, before you heat it up have a practice run of pushing it together, so that once it is sticky you can get it right first time, then pop it into the press or hammer it on a last.
Other Notes skive the edges of the patch, otherwise it maybe un comfy an you may see the shape from the outside. Choosing leather, if patching on the outside, match the look. Generally you don’t want thick or stretchy leather, so I guess that leaves thin and firm?
- Decide patch inside, outside or between lining? Between lining and upper is best.
- If inside, don’t always need to lift sole, all others usually lift sole.
- Cut, skive and glue patch in. Patch needs to be 25mm wide and long enough to go past the end of the tear by 10mm, round corners on edge of patch tend to be best
- Stitch patch in – sometimes you will glue it so well it doesn’t need stitching
- Reglue upper to insole board – this is where the shoe gets it strength,
- Check that the sole fits properly - Glue sole back on
Deciding whether to remove sole – if you can patch it without removing the sole, go for it. Otherwise remove the sole.
Removing the sole – use pincers gently and maybe a screwdriver poked all the way around to start the glue coming undone. Heat may help but best used as a last resort as it can give you other issues, melting, burning, upsets the glue and makes the sole twist out of shape.
- Dig right round with a screw driver – use plenty of force and get your body weight over the shoe, be methodical and go right round the area you want unglued
- Use pincers carefully to ease the rest off
Gluing - the patch in – one coat onto patch and the upper but not the lining, then pop the patch in, check that it has not bunched up anywhere and that it covers the tear at both ends and that the patch goes over both sides by 10mm.
Stitching - less stitching is usually better than more stitching, you want as little stitching showing as possible while still ensuring a robust repair. Zig zagging along the tear is often the best.
Gluing - the lining back – just enough to hold it in place while you glue the lining and upper back onto the insole board, check that there is no bumps or creases in the lining
Gluing - the lining and the upper onto the insole board – look for marks and lines on the insole board that indicate where the upper used to sit glue the lining and upper back onto the insole board, recheck that there is no bumps or creases in the lining, and also check that the upper now fits nicely onto the sole – all the way around, if it doesn’t now is the time to pull it apart and let a bit out or tuck a bit more in.
Gluing – upper to the sole – sometimes atom is appropriate, before you heat it up have a practice run of pushing it together, so that once it is sticky you can get it right first time, then pop it into the press or hammer it on a last.
Other Notes skive the edges of the patch, otherwise it maybe un comfy an you may see the shape from the outside. Choosing leather, if patching on the outside, match the look. Generally you don’t want thick or stretchy leather, so I guess that leaves thin and firm?


