COBBLIX.COM
  • Home

Insoles

Main steps

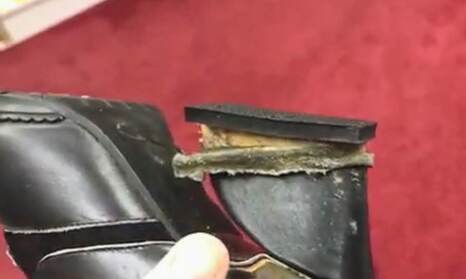
​1 Remove old left insole 
2 Trace onto leather and cut out
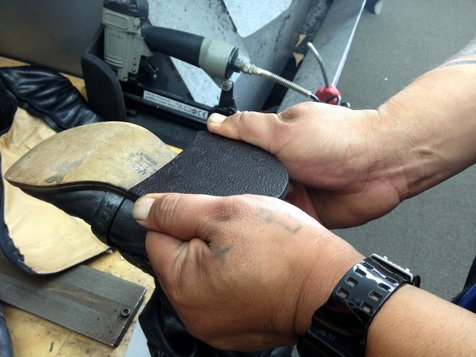
3 Test fit and re trim if needed
4 Use new insole as pattern to make right insole
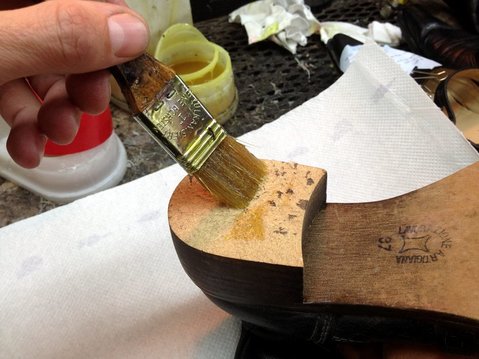
5 Glue left shoe then insole and slide in
6 Glue right shoe then insole and slide in
7 Polish, inspect and put on shelf.​

Main steps explained - NEW PICS NEEDED
​

1. Remove old left insole 

Removing worn heel on shoe
​
 Be aware that if you stretch them they will not make such a good pattern

2. Trace onto leather and cut out

Sanding heel on shoe
Check both sides of leather for flaws before marking out.
1. Trace the left insole, onto the back of the new leather 
2. Cut on the inside of your line 
3. Try it for fit, if it needs adjusting, start at the heel and go clockwise around ensuring it is 100% as you go. 
4. Trace and cut the right insole 
If the old insoles are wrinkled, get the left one fitting 100%,  and then you will be able to just tip it upside down and copy it, try it in the shoe first

3. Test fit and re trim if needed

Picture
If 3/4 insole. Draw a line across where new insole ends at front. Sand up to this line on the shoe for a good join.
​Skive the back of the front edge of new insole so no bump under foot.
Put shoes together back to back. With some heel shapes, one up each way works well.
​Ensures even heights.

4. Use new insole as pattern to make right insole

Picture

5. Glue left shoe then insole and slide in

Picture
1. Glue left and then right shoe 
2. Glue left insole and slide in 
3. Glue right insole and slide in 
4. Check the edges! This is where you are least likely  to glue, and where they are most likely to come apart! 
Flip glue board between insoles so that you avoid getting glue onto the nice side of the insole

6. Glue right shoe then insole and slide in

Gluing heel on shoe
Plenty of glue. From middle to edge. ​Keeps glue off sides of heel block.
If its a TPR heel block ... use TPR Primer then Clear glue.
PU ... use clear glue.
NOTE you will also need to use Clear glue over the Yellow 
glue on the Dupla heels.

7. Polish, inspect and put on shelf.​

Heating new heel
Heat heel rubber only.
​To make it conform to the heel block and easy to trim.

Submit
Copyright © Cobblix.com 2019
  • Home