Half soles 3-6mm
Yes sure we can
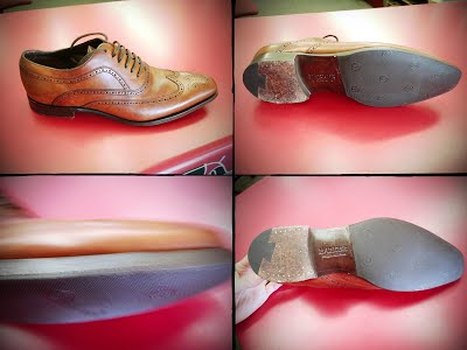
Suits worn soles that need replacing
Main Steps
|
|
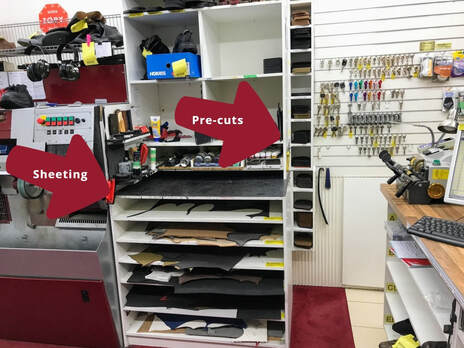
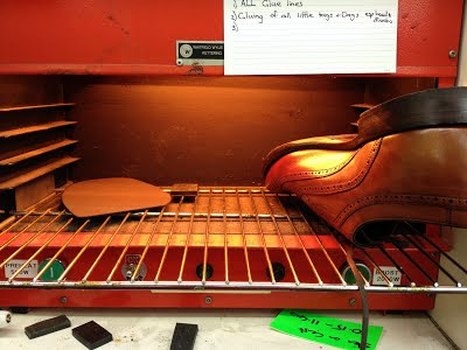
1. Select sole
|
|
Use a precut or cut out new sole.
2. Mark line
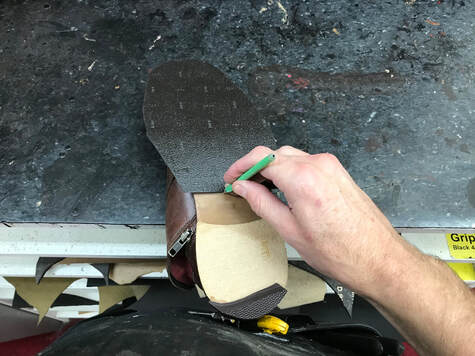
20-30mm back from wear line. Line is drawn on the waist of the shoe, generally on an angle; draw the line so that it gets ground off.
Small ladies shoe 20mm. Large mens shoe or ladies chunky boot 30mm. |
|
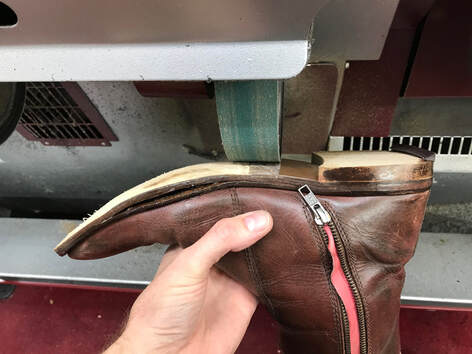
3. Grind shoe then sole
|
|
Straight and shallow grind. Grind to edge of shoe. Taper the new sole and check for fit. Need a nice "square" edge.
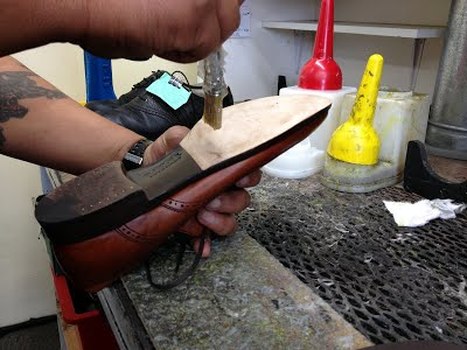
4. Glue shoe then sole
|
Start gluing in front of taper and come back to the join.
Ensure join has glue on it the entire way across and check corners and all around sole edge. |
Shoe is safer out of the way and often needs 2 coats. New sole only needs one coat as it's not porous.
5. Heat and assemble
Heat for 1 Boost. Sometimes you may need a bit moreon toe if it's not getting enough heat. Or hold shoe at a better angle.
Shoe on last then line new sole up and press firmly at waist. Then roll forward. Press firmly with your hands.
Hammer Waist, the centre then all around edges. Moving the shoe as needed to keep last under the bit you are hammering.
CHECK glue line is sealed and consistent.
Press.
Shoe on last then line new sole up and press firmly at waist. Then roll forward. Press firmly with your hands.
Hammer Waist, the centre then all around edges. Moving the shoe as needed to keep last under the bit you are hammering.
CHECK glue line is sealed and consistent.
Press.
6. Trim with knife
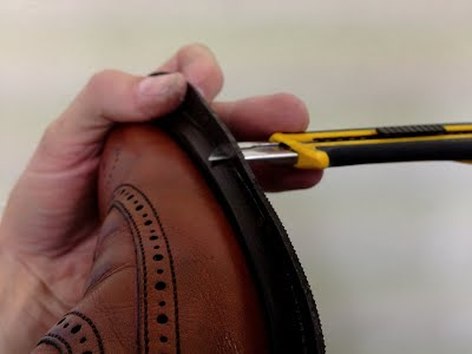
Nice and close.
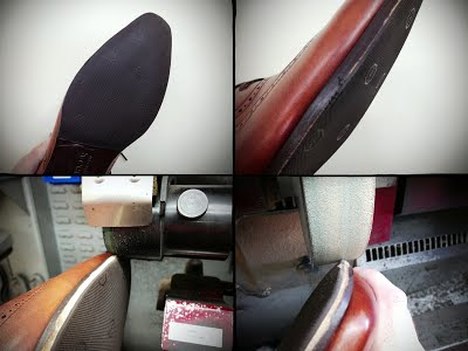
7. Trim with machine
|
Mini Band
Sole Trimmer |
Mini band or Sole Trimmer. Remove burrs. Rub off any random bits of glue with your piece of crepe.
8. Polish
Paint or dye edges and polish.